051 - Ogron
From Day of the Daleks (1972) and Frontier in Space (1973)
Version 1 - Updated 1/26/2026
Beta: https://drive.google.com/file/d/1aPKFDXZfYl7xx1hzq8_U_pIsHT5lFRP_
Note: Make sure you download the full zip file. Google drive preview only shows 8 of the 21 files.

This figure was created using MakerWorld's ImageTo3D app (using production photos of the original actors as a source), and then mucked about with significantly over the course of four months in Meshlab and TinkerCAD to create the final version you see here.

The files used to print this figure are the same, regardless of whether you are printing in PLA (filament) or SLA (resin) though if you are printing out of SLA resin, I recommend using at least a 20% mixture of flexible resin like 3DMaterials SuperFlex (preferred, if you can get it) or SirayaTech Tenacious as a strengthening agent for
added durability. Without flexible resin, smaller parts may break off if dropped or played with
too hard. If you are printing out of PLA, I recommend buying PLA+ which will give you better
surface detail on the head and hands.
The gun accessory is going to be extremely fragile and only 1mm wide in some places, so it is ONLY designed to be printed out of flexible resin.
This figure comes with two alternate heads, which you can swap out or use for army building.

This figure requires at least one 1.5mm wide brass rod to be trimmed to length for the shoulder, elbow, knee, and hip pivots. These craft rods can be found online or in most craft stores that have a model airplane section. Alternatively you can use a thin wire coat hanger, sturdy piece of craft wire, or even a toothpick but you may need to widen some holes prior to final curing with a small hand drill.

Before painting, it is recommended that you fit all parts loosely together without glue to make sure that they fit and move freely. You may need to sand down some parts or drill out some holes if they are too tight or don't fit together smoothly.

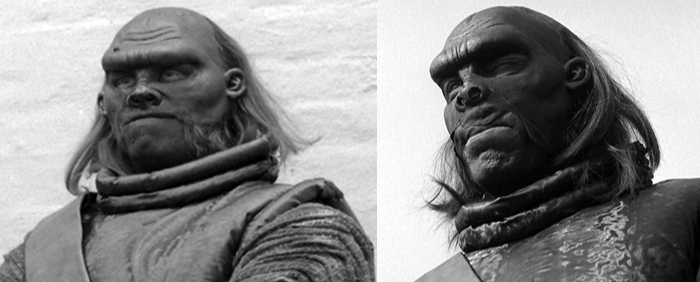
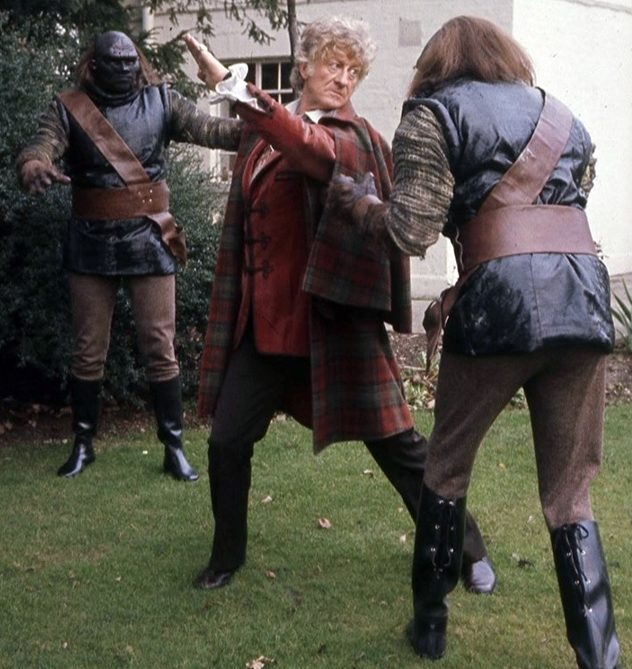
There was a considerable amount of variation between the Ogron costumes and overall quality of the prosthetics, with the ones recycled for Frontier in Space generally looking the more worse for wear.
The two heads for thisfigure were primarily based upon reference photos from Day of the Daleks; one of the higher quality Ogrons used for close-ups (who I think was played by David Joyce), and one of the slightly more fakey looking back-up Ogrons (who I think was played by Rick Lester, but might have possibly been Frank Menzies.)
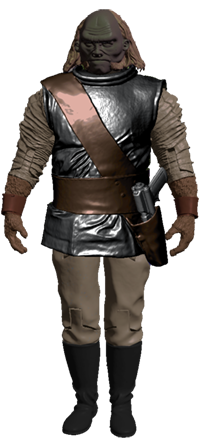
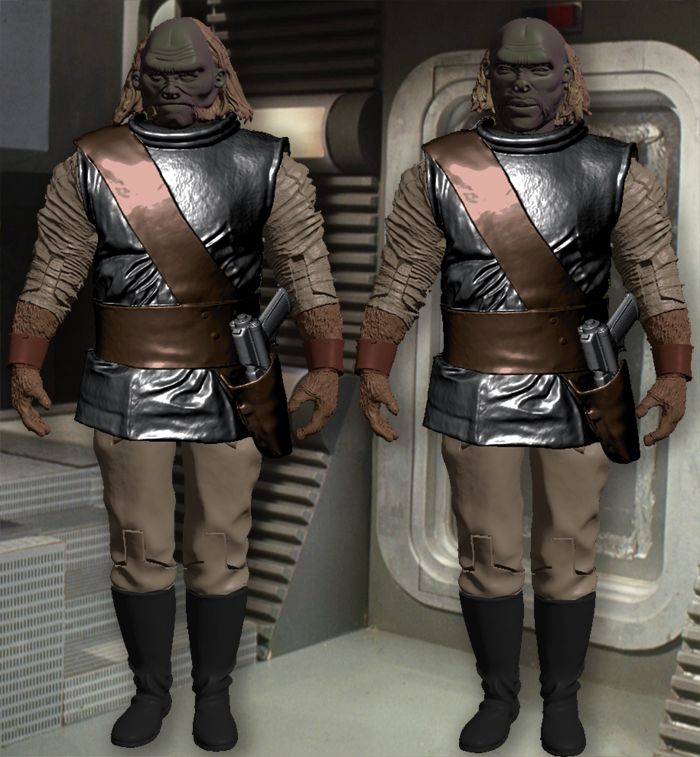
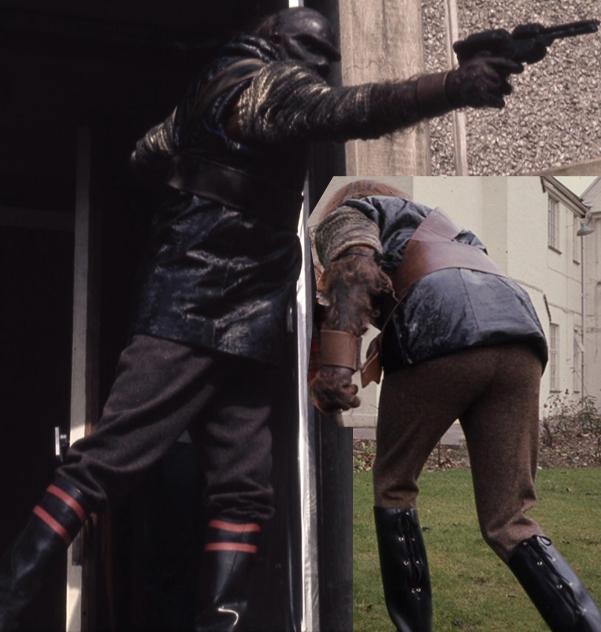
The primary outfit consists of a shiny black faux-leather vest with a brown leather belt/sash/holster combo. The lower pants are a lighter brown burlap color, with black boots. The sleeves are an off-white dirty wrinkled fabric that looks a bit like an oversized Ace bandage.
The hands have a wrist guard the same color as the belt/sash. Note that directly above the holster, there are four brass flat grommets attaching the belt to the sash. The back of the hands are covered in a dirty reddish "orangutan" hair similar to the hair on the back of the head.
The skin-tone is an extremely dark bluish brown simlar to extemely dark African skintone, but in close-ups we can see that the pigmentation tends to lighten around the forehead wrinkles, eyelids, lower jaw, and corners of the mouth (where the makeup obviously teneded to rub off.).
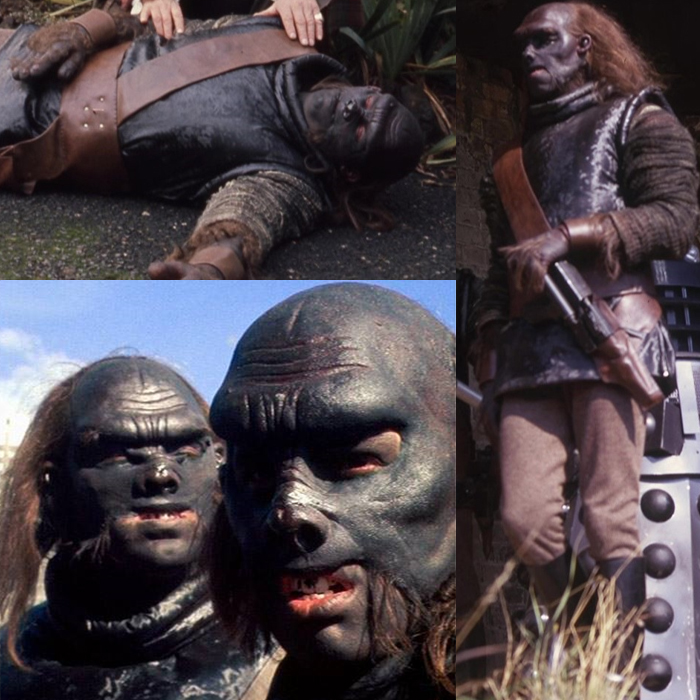
The inside of the hands and fingernails tended to be a lighter reddish brown color, similar to the hair.
Coloration of the sleeves ranged from bright white, to extremely filthy yellow bordering on black.

The boots and pants also also differed slightly. Some of the Day of the Daleks Ogrons wore riding boots that laced up the back, while some of the Frontier Ogrons wore wellies with red stripes, and a darker brown shade of pants, and their sash/belts were shorter and a lighter more yellow color of leather.

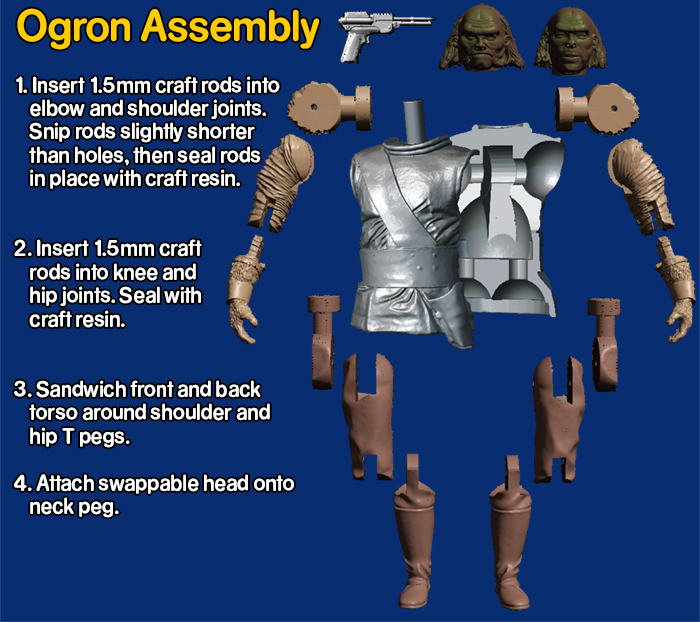
Begin by inserting your 1.5mm wide brass rod into the shoulder and elbow holes. Snip the rod about 1-2mm shorter than the hole. You can then seal the open end of the hole with UV craft resin, glue, or sculpter's putty to seal the rod in place.
Then repeate this process for the knees and hip joints to assemble the lower half of the body.
Once all four limbs are assembled, insert the T-plugs into the body and glue the back in place to lock them into their sockets.
Make sure that the shoulder and legs rotate freely and did not get any glue on them. (Note that the legs are designed to only rotate about 120°. Do not try to rotate them further, or they may break.)
Finally, attach your choice of swappable head onto the neck peg, but do not glue it in place. The head should remain in place due to friction alone. If not, you can try adding a small amount of tape or silicon Plasti-Dip to the neck peg.

Coming soon.
|