049 - Nyssa of Traken
From Castrovalva (1982) through Arc of Infinity (1983)
Version 1 - Updated 6/1/2025
Finished: https://drive.google.com/file/d/1sL8Dow8LzJmMqwiq2MMOSUejZeMGixk3/

The head for this figure was built using a photo of Sarah Sutton and Meshlab's "Make My Statue" app. And then mucked about with significantly. The rest of the figure was built in a combination of Meshlab and TinkerCAD as is my usual practice.

The files used to print this figure are the same, regardless of whether you are printing in PLA (filament) or SLA (Resin.)
There are two alternate versions of the arms: a one piece version which has the upper and lower arm fused together into a single part, and a two piece version where the upper and lower arms are articulated. Given how fragile the two piece version is, I would only advise using it if you are willing to print the lower arms out of 100% flexible resin. If you are using regular PLA or standard ABS-like resin, it is highly recommended you go with the sturdier one piece arms, which are less likely to break.
If you are printing out of resin, I recommend using a 20% mixture of flexible resin like 3DMaterials SuperFlex (preferred, if you can get it) or SirayaTech Tenacious as a strengthening agent for the figure as a whole. The lower arms (if you are printing the two-part articulated version, should be printed out of 100% flexible resin.
If you are printing with filament, consider using PLA+ for the head and hands for maximum surface detail.

This figure requires at least one 1.5mm wide brass rod to be trimmed to length for the shoulder, elbow, knee, and hip pivots. These craft rods can be found online or in most craft stores that have a model airplane section. Alternatively you can use a thin wire coat hanger, sturdy piece of craft wire, or even a toothpick but you may need to widen some holes prior to final curing with a small hand drill.

Before painting, it is recommended that you fit all parts loosely together without glue to make sure that they fit and move freely. You may need to sand down some parts or drill out some holes if they are too tight or don't fit together smoothly.

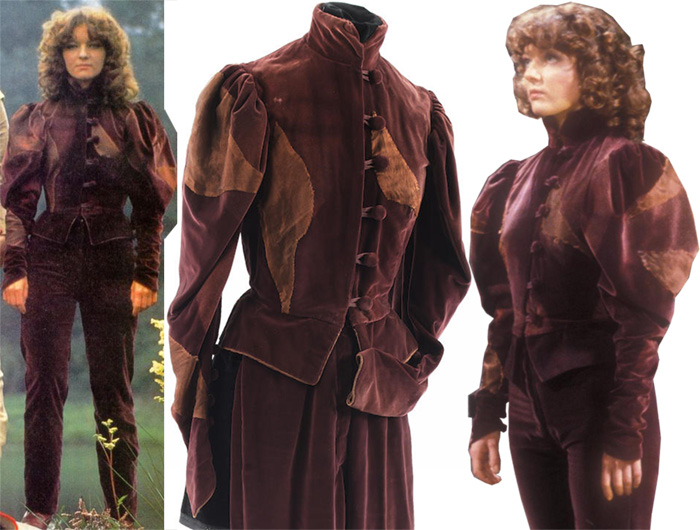
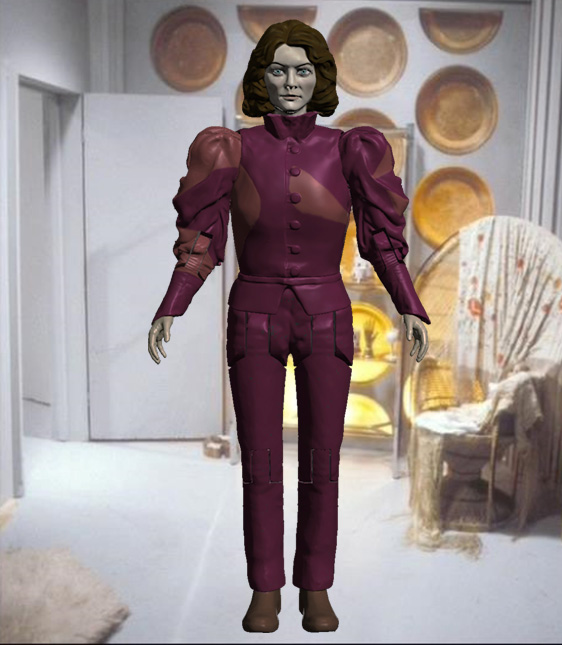
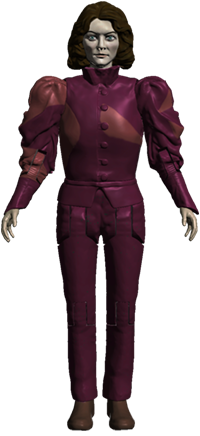
Nyssa's primary outfit remained unchanged from the second half of Castrovalva (she lost the skirt and fur-lined jacket while lugging around the zero cabinet) through Arc of Infinity. It is a deep maroon velvet, but accented with somewhat random looking chocolate brown swooshes on the sleeves and chest. Her shoes appear to be standard brown Oxfords.
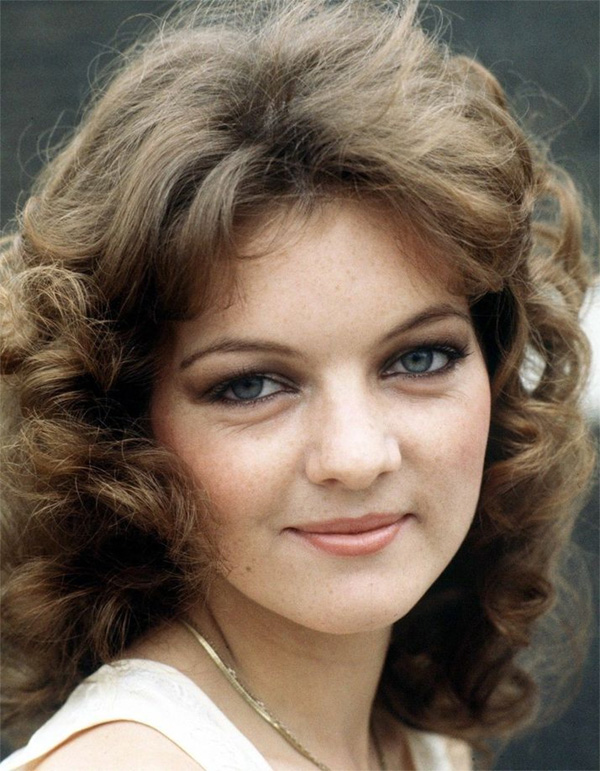
Her eyes are a light steel blue and she typically wore dark eye-liner and eye shadow, with a little bit of blush around the cheeks.

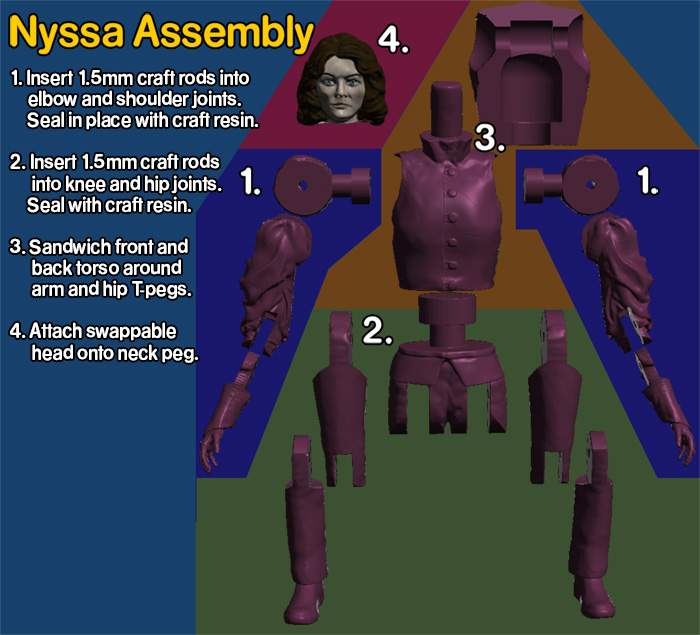
Begin by inserting your 1.5mm wide brass rod into the shoulder and elbow holes (if printing the two-part arms). Snip the rod about 1-2mm shorter than the hole. You can then seal the open end of the hole with UV craft resin, glue, or sculpter's putty to seal the rod in place.
Then repeate this process for the knees and hips to assemble the lower half of the body.
Once all four limbs are assembled, insert the T-plugs into the body and glue the back in place to lock them into their sockets.
Make sure that the shoulder and waist spin freely and did not get any glue on them.
Finally, attach the swappable head onto the neck peg, but do not glue it in place. While this figure does not currently have any alternate heads, I might release an alternate curly haired Castrovalva variant in the future. The head should remain in place due to friction alone. If not, you can try adding a small amount of tape or silicon Plasti-Dip to the neck peg.

Coming soon.
|
 |